×
- Hello
- Login or Register
- Quick Links
- Live Chat
- Track Order
- Parts Availability
- RMA
- Help Center
- Contact Us
- Shop for
- Volvo Parts
My Garage
My Account
Cart
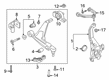
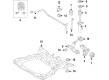
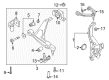
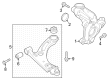
Genuine Volvo Control Arm
Suspension Arm- Select Vehicle by Model
- Select Vehicle by VIN
Select Vehicle by Model
orMake
Model
Year
Select Vehicle by VIN
For the most accurate results, select vehicle by your VIN (Vehicle Identification Number).
163 Control Arms found

Volvo Upper Control Arm, Passenger Side Part Number: 31360837
$121.59 MSRP: $179.45You Save: $57.86 (33%)Ships in 1-2 Business DaysProduct Specifications- Other Name: Control Arm; Suspension Control Arm; Upper Control Arm
- Position: Passenger Side
- Replaced by: 32395245

Volvo Upper Control Arm, Driver Side Part Number: 31476301
$121.27 MSRP: $182.22You Save: $60.95 (34%)Ships in 1-2 Business DaysProduct Specifications- Other Name: Control Arm; Upper Control Arm
- Position: Driver Side

Volvo Upper Control Arm, Passenger Side Part Number: 31476302
$121.59 MSRP: $179.45You Save: $57.86 (33%)Ships in 1-2 Business DaysProduct Specifications- Other Name: Control Arm; Upper Control Arm
- Position: Passenger Side
- Replaced by: 32395247
Volvo Upper Control Arm, Driver Side Part Number: 31360836
$121.59 MSRP: $179.45You Save: $57.86 (33%)Ships in 1-2 Business DaysProduct Specifications- Other Name: Control Arm 2505; Suspension Control Arm
- Position: Upper Driver Side
- Replaced by: 32395244


Volvo Upper Control Arm, Driver Side Part Number: 32395242
$121.59 MSRP: $179.45You Save: $57.86 (33%)Ships in 1-2 Business DaysProduct Specifications- Other Name: Control Arm 2602; Upper Control Arm
- Position: Driver Side
- Replaces: 31360630
Volvo Upper Control Arm, Passenger Side Part Number: 32395243
$121.59 MSRP: $179.45You Save: $57.86 (33%)Ships in 1-2 Business DaysProduct Specifications- Other Name: Control Arm 2602; Upper Control Arm
- Position: Passenger Side
- Replaces: 31360633

Volvo Upper Control Arm, Driver Side Part Number: 32395244
$121.59 MSRP: $179.45You Save: $57.86 (33%)Ships in 1-2 Business DaysProduct Specifications- Other Name: Control Arm 2602; Upper Control Arm
- Position: Driver Side
- Replaces: 31360836
Volvo Upper Control Arm, Passenger Side Part Number: 32395245
$121.59 MSRP: $179.45You Save: $57.86 (33%)Ships in 1-2 Business DaysProduct Specifications- Other Name: Control Arm 2601; Upper Control Arm
- Position: Passenger Side
- Replaces: 31360837

Volvo Lower Control Arm, Passenger Side Part Number: 31681839
$131.08 MSRP: $193.44You Save: $62.36 (33%)Ships in 1-2 Business DaysProduct Specifications- Other Name: Multiple Pn Change; Control Arm; Lower Control Arm
- Position: Passenger Side
Volvo Lower Control Arm, Driver Side Part Number: 31681840
$132.14 MSRP: $195.01You Save: $62.87 (33%)Ships in 1-2 Business DaysProduct Specifications- Other Name: Multiple Pn Change; Control Arm; Lower Control Arm
- Position: Driver Side

Volvo Control Arm, Passenger Side Part Number: 8628496
$178.39 MSRP: $263.26You Save: $84.87 (33%)Ships in 1-2 Business DaysProduct Specifications- Other Name: Control Arm Kit; Track Control Arm; Control Arm, Lower Control Arm
- Position: Passenger Side

Volvo Lower Control Arm, Driver Side Part Number: 32211429
$173.25 MSRP: $260.32You Save: $87.07 (34%)Ships in 1-2 Business DaysProduct Specifications- Other Name: Control Arm; Lower Control Arm
- Position: Driver Side
Volvo Lower Control Arm, Passenger Side Part Number: 32211430
$173.25 MSRP: $260.32You Save: $87.07 (34%)Ships in 1-2 Business DaysProduct Specifications- Other Name: Control Arm; Lower Control Arm
- Position: Passenger Side
Volvo Lower Control Arm, Passenger Side Part Number: 32221282
$173.25 MSRP: $260.32You Save: $87.07 (34%)Ships in 1-2 Business DaysProduct Specifications- Other Name: Control Arm
- Position: Lower Passenger Side
- Replaced by: 32400869
Volvo Lower Control Arm, Driver Side Part Number: 32221283
$173.25 MSRP: $260.32You Save: $87.07 (34%)Ships in 1-2 Business DaysProduct Specifications- Other Name: Control Arm
- Position: Lower Driver Side
- Replaced by: 32400870

Volvo Lower Control Arm, Passenger Side Part Number: 32395076
$173.25 MSRP: $260.32You Save: $87.07 (34%)Ships in 1-2 Business DaysProduct Specifications- Other Name: Control Arm
- Position: Lower Passenger Side
- Replaced by: 32400867
Volvo Lower Control Arm, Driver Side Part Number: 32395077
$173.25 MSRP: $260.32You Save: $87.07 (34%)Ships in 1-2 Business DaysProduct Specifications- Other Name: Control Arm
- Position: Lower Driver Side
- Replaced by: 32400868
Volvo Control Arm, Driver Side Part Number: 8628497
$180.76 MSRP: $266.76You Save: $86.00 (33%)Ships in 1-2 Business DaysProduct Specifications- Other Name: Suspension Control Arm And Ball Joint Assembly; Control Arm
- Position: Driver Side

Volvo Lower Control Arm, Driver Side Part Number: 31658893
$185.15 MSRP: $275.51You Save: $90.36 (33%)Ships in 1-2 Business DaysProduct Specifications- Other Name: Control Arm; Lower Control Arm
- Position: Driver Side
Volvo Lower Control Arm, Passenger Side Part Number: 31658894
$185.15 MSRP: $275.51You Save: $90.36 (33%)Ships in 1-2 Business DaysProduct Specifications- Other Name: Control Arm; Lower Control Arm
- Position: Passenger Side
| Page 1 of 9 |Next >
1-20 of 163 Results
Volvo Control Arm
Volvo Control Arm helps give you greater confidence on the road by keeping each of your front wheels perfectly aligned and free to move over bumps. Volvo has made a world-renowned name combining Scandinavian simplicity with pioneering safety, from inventing the three-point seat belt to incorporating smart brakes and clear instrumentation that allows drivers to focus on the journey. Across decades, Volvo refines its chassis to suit its safety goals. The company welcomes clean styling, robust materials, and a move toward electric powertrains and shows how Volvo is combining comfort with environmental awareness and retaining the solid ride its heritage started in Gothenburg in 1927. Every vehicle has this mindset, and it's a trustworthy vehicle providing modern yet familiar cabins for families and commuters. Within that trusted suspension system, the Control Arm is the quiet anchor that connects the chassis to the steering knuckle via durable bushings and a precise ball joint. This Control Arm enables the wheel to move smoothly up and down, transfers road forces through the springs or shocks, and provides lateral control so that tires will stay planted during sharp turns or when the vehicle stops abruptly. Lightweight alloys or stamped steel provide the strength to resist corrosion and impact without being overly complicated for the application, but the design is kept simple for consistent performance across the entire range. A stable Control Arm means each Volvo continues to have its signature smooth ride, predictable handling, and enduring safety that drivers appreciate mile after mile.
Trust OEM Control Arm for quality that holds up. These parts use top-tier materials to keep your ride running smooth. Because they match exact Volvo specs, you get a flawless fit and a hassle-free install every single time. No more fighting with parts that just won't line up. It is easy to search our massive stock of genuine Volvo options at prices you will really like. Every part comes with a real manufacturer's warranty and a simple return policy. Plus, we ship fast to get your order to you. Shop with confidence and give your Volvo the reliability it deserves.
Volvo Control Arm Parts and Q&A
- Q: How to properly install and replace the control arm and bushings on Volvo 740?A:On all models, fully install the control arm, bounce the suspension several times, and then tighten the control arm-to-crossmember mounting nuts or bolts. For the 240 Series, raise the vehicle and support it safely, remove the wheel(s), disconnect the stabilizer link at the control arm, remove the control arm from the ball joint, remove the rear attachment plate, and the front retaining bolt before taking out the control arm. If bushings are to be replaced, note that the right and left bushings are not interchangeable, with the right side bushing turned so that the small slots point horizontally when installed. Install the bracket onto the control arm, ensuring the nut is tightened just enough to hold securely, then attach the control arm, install the front retaining bolt and nut, and guide the stabilizer link into position. Install the ball joint and its mount, tighten the three mounting bolts to specification, install the rear bracket to the vehicle, and tighten the three bolts to 25-35 ft. lbs. (34-48 Nm). Tighten the stabilizer link, install the wheel(s), lower the vehicle, jounce the front of the vehicle up and down to normalize the front suspension, and tighten the rear mount nut to 38-44 ft. lbs. (52-60 Nm) and the front mount to 55 ft. lbs. (75 Nm). For the 700, 900, S90, and V90 Series, raise the vehicle and support it safely, remove the wheel(s), remove the cotter pin and ball joint nut, disconnect the stabilizer link, disconnect the strut bolt, and remove the front bushing. Use a ball joint puller to separate the ball joint from the control arm, unbolt the control arm at the crossmember, and remove the arm. If bushings are to be replaced, use a press to support the arm from below and press in new bushings from the front side. Fit the control arm over the end of the strut rod, install it in the crossmember without fully tightening the nut, install the ball joint, tighten the nut to 44 ft. lbs. (60 Nm), install a new cotter pin, and tighten the strut rod bolt to 70 ft. lbs. (95 Nm). Attach the stabilizer link and tighten it to 63 ft. lbs. (86 Nm), install the wheel(s), lower the vehicle, and jounce the front of the vehicle before tightening the control arm-to-crossmember bolt to 63 ft. lbs. (86 Nm). For the 850, C70, S70, and V70 Series, raise and safely support the vehicle, remove the through-bolt securing the ball joint to the spindle, remove the ball joint from the spindle, and remove the bolts and nuts holding the lower control arm to the frame before removing the lower control arm. Clean the ball joint and subframe where the lower control arm mates, install the lower control arm in the frame with new bolts and nuts, tighten the lower control arm subframe bolts to 48 ft. lbs. (65 Nm) and then angle tighten 120°, apply rustproofing compound to the lower control arm nuts, connect the ball joint to the spindle, and tighten the bolt to 13 ft. lbs. (18 Nm) before lowering the vehicle. For control arm bushing replacement in the 240 Series, raise the vehicle and support it safely, mark the position of the wheel stud nearest to the valve, disconnect the stabilizer link, remove the lower control arm, remove the rear bracket, and drive out the old bushings. When replacing the bushings, ensure the right side bushing is turned so that the small slots point horizontally when installed, install the new bushings onto the control arm, install the bracket, and then install the control arm and stabilizer link before installing the wheel and lowering the vehicle. For the 700, 900, S90, and V90 models, raise and safely support the vehicle, mark the position of the wheel stud nearest to the valve, remove the lower control arm, press out the bushing with a suitable drift, press in the new bushing with a suitable drift using disc 5240 or equivalent as support, install the control arm, install the wheel, and lower the vehicle. For the 850, C70, S70, and V70 Series, raise and safely support the vehicle, remove the wheel(s), remove the control arm, clean the bushing outer sleeves, press out the bushings using tools 5481 and 5482 or equivalent, press in the new bushings using the same tools, install the control arm, install the wheel(s), and lower the vehicle.
- Q: How to replace the front Control Arm and balljoint on Volvo V40?A:Chock the rear wheels, also apply the handbrake firmly and loosen the relevant nuts on the front wheels. Jack up the front of the car and support it on axle stands and remove the front wheel. Slacken and remove control arm rear mounting bracket bolts and front pivot bolt and nut and free control arm from subframe. Unscrew the nut on the control arm balljoint a few revolutions, and then use a universal balljoint separator to release the balljoint shank from the swivel hub. Remove the nut completely and manoeuvre the arm away from the car. Thoroughly clean the control arm and the area around the arm mountings removing all traces of dirt and underseal if necessary, check carefully for any cracks, distortion or any other signs of wear or damage paying particular attention to the pivot bushes and balljoint. The balljoint is an integral part of the control arm and can't be renewed separately; should they be damaged, the complete arm is to be renewed. If the balljoint is serviceable but the gaiter shows signs of damage or deterioration renew the gaiter by releasing the retaining springs and sliding it off the balljoint. Grease the balljoint and then slide the new gaiter in place making sure it is correctly located on the control arm and fix it in place using the retaining springs and making sure they are correctly seated in the gaiter grooves. Renewal of either pivot bush requires a hydraulic press and several spacers which is best left to a Volvo dealer or garage with the necessary equipment. If available press out the front bush and install the new one, making sure that it is projecting out of the arm equally on both sides. The positioning of the rear bush is critical so note the exact positioning of the bush locating pin prior to removal and press on the new bush ensuring the location of the bush locating pin is exactly the same as before, to avoid excess of load on the bush rubber material. Manoeuvre the control arm into position and find the balljoint shank in the base of the swivel hub, re-fitting the retaining nut to balljoint - tightening by hand only. Find the control arm front bush in the subframe, insert the pivot bolt and put into the new nut, only at this stage tight with your hands. Refit the control arm rear mounting bracket, being sure to correctly engage it with the pivot bush, and tighten its retaining bolts to the specified torque. Tighten the balljoint nut up to the specified torque, then refit the roadwheel, raise the car to the ground and tighten the wheel nuts to the specified torque. Rock the car to get the control arm down in place, then with the car on wheels, tighten the front pivot bolt to the indicated torque. Check and adjust (if necessary) the alignment of the front wheel.


Related Volvo Parts
 Volvo Coil Springs
 Volvo CV Joint
 Volvo Steering Knuckle
 Volvo Sway Bar Link
 Volvo Trailing Arm
 Volvo Camber and Alignment Kit
 Volvo Coil Spring Insulator
 Volvo Shock Absorber
 Volvo Shock and Strut Boot
 Volvo Stub Axle
 Volvo Sway Bar Bracket
 Volvo Wheel Seal
Browse by Model
240 Control Arm 244 Control Arm 245 Control Arm 740 Control Arm 760 Control Arm 780 Control Arm 850 Control Arm 940 Control Arm 960 Control Arm C30 Control Arm C40 Recharge Control Arm C70 Control Arm S40 Control Arm S60 Control Arm S60 Cross Country Control Arm S70 Control Arm S80 Control Arm S90 Control Arm V40 Control Arm V50 Control Arm V60 Control Arm V60 Cross Country Control Arm V70 Control Arm V90 Control Arm V90 Cross Country Control Arm XC40 Control Arm XC40 Recharge Control Arm XC60 Control Arm XC70 Control Arm XC90 Control Arm