×
- Hello
- Login or Register
- Quick Links
- Live Chat
- Track Order
- Parts Availability
- RMA
- Help Center
- Contact Us
- Shop for
- Volvo Parts
My Garage
My Account
Cart
Genuine Volvo V50 Camshaft
Cam- Select Vehicle by Model
- Select Vehicle by VIN
Select Vehicle by Model
orMake
Model
Year
Select Vehicle by VIN
For the most accurate results, select vehicle by your VIN (Vehicle Identification Number).
4 Camshafts found


Volvo V50 Camshaft Part Number: 8250527
$342.13 MSRP: $407.30You Save: $65.17 (16%)Ships in 1-2 Business Days
Volvo V50 Camshaft Part Number: 8250509
$447.56 MSRP: $582.77You Save: $135.21 (24%)Ships in 1-2 Business Days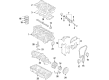
Volvo V50 Camshaft Part Number: 8670147
$342.13 MSRP: $407.30You Save: $65.17 (16%)Ships in 1-2 Business DaysVolvo V50 Camshaft Part Number: 8670149
$502.52 MSRP: $654.33You Save: $151.81 (24%)Ships in 1-2 Business Days
Volvo V50 Camshaft
OEM parts are the only choice for top quality and real functionality. They pass strict checks, and they match Volvo's factory specs, so installation is easy. If you need new Camshaft and you want quality and fit. You will find both here. Our site has a wide range of OEM Volvo V50 parts. The prices are unbeatable, allowing you to get value for money. Each genuine V50 Camshaft comes with the manufacturer's warranty. That gives you peace of mind. We ship fast to your door. Order today, and enjoy a smooth, no-hassle upgrade with parts that fit right.
Volvo V50 Camshaft Parts and Q&A
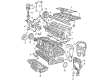
- Q: What are the steps involved in removing and inspecting the camshaft and valve lifter for 1.8 and 2.0 litre petrol engines on Volvo V50?A:Only turn the engine's direction of rotation which is anticlockwise from the right-hand side of the vehicle. Start by taking the cylinder head cover off and setting the engine to TDC on No 1 cylinder. To reach the timing chain tensioner and guide, remove the timing chain cover's lower and upper blanking plugs. Slacken the timing chain tensioner tensioning using a small screwdriver to release the pawl mechanism, then gently turn the exhaust camshaft clockwise to compress the tensioner. While holding the exhaust camshaft in place, insert a bolt in the upper access hole in the timing chain cover to hold the tensioner guide rail in place. With the camshafts in position, loosen the camshaft sprocket retention bolts and take a cable tie and attach the timing chain to the camshaft sprockets. Remove the camshaft sprocket retaining bolts and sprockets along with the timing chain and keep them in place with an appropriate piece of wire to prevent it from falling into the timing cover. Gradually and evenly slacken the camshaft bearing cap bolts by half a turn at a time to take away the pressure of the valve springs, and then withdraw the camshaft bearing caps, making note of the marks on them, and withdraw the camshafts. To identify the intake camshaft relative to the reference lobe for the camshaft position sensor: No marking of the camshafts is necessary. Obtain sixteen little clean containers, numbered from 1 to 16, and with the help of a rubber sucker withdraw each of the said bucket tappet in turn, placing them in the containers without interchanging them, since they are of different sizes. Check each camshaft and tappet for evidence of wear and measure the outside diameter of the camshaft for each tappet with a micrometer, making several measurements to look for any taper or ovality. Visually inspecting the camshaft lobes for score marks, pitting, galling and signs of overheating, renewing camshaft lobes with such signs. Inspect the camshaft bearing journals and cylinder head bearing surfaces for wear or pitting, measuring each journal's diameter at a number of points with a micrometer. To check camshaft endfloat, clean the bearing surfaces, refit the camshafts and bearing caps, tighten the bearing cap bolts to specified torque and measure the endfloat, using a DTI. If the endfloat is greater than the specified service limit, replace the new component or replace the cylinder head if clearance is still excessive. During reassembly, oil the cylinder head tappet bores and tappets, carefully refitting each of the tappets to its original bore. Turn the engine back about 45deg to be certain you haven't got any pistons at the top of the cylinders, and then lubricate the camshaft bearings and lobes with oil and refit the camshafts in their original places. Each camshaft bearing cap is marked with a number and letter and caps should be tightened in sequence, gradually putting pressure on the valve springs. Fit the camshaft aligning tool to set TDC then refit camshaft sprockets with timing chain, without tightening the retaining bolts at this point. Remove tensioner guide rail locking bolt and turn engine approximately 45 degrees to TDC. With the camshafts held in position, tighten the camshaft sprocket holding bolts to the camshaft specified torque. Remove the camshaft locking plate and crankshaft timing peg, making two full revolutions of the engine, and refit the locking plate and peg to the engine to ensure that the engine stays at TDC. Finally, refit the timing chain cover upper and lower blanking plugs (use a suitable sealant on the threads to prevent leaks) and the cylinder head cover.
- Q: What steps are involved in refitting the Camshaft, Rocker Arm and Valve Lifter for 2.0 litre 4-cylinder diesel engine on Volvo V50?A:A new camshaft oil seal will be required on refitting. Begin by removing the timing belt, timing chain tensioner and air cleaner assembly. At the left hand end of the cylinder head, remove the hose from the vacuum pump, undo the nut fixing the EGR pipe and fuel supply hose and then remove the pump after undoing the three Allen bolts. Check the condition of the pump O-ring seals and replace if needed. Next, remove the high pressure fuel pipe between the fuel rail and high pressure pump, remove the old pipe and cover the openings to avoid contamination. Disconnect fuel supply and return hoses from high pressure pump, taking care to plug or seal the openings. Disconnect wiring plug(s) from the high-pressure fuel pump then undo the three retaining bolts to remove from pump, ready for fuel spillage. To remove the sprocket from the exhaust camshaft, remove the injectors and the retaining bolt that holds the sprocket in place, using a tool to stop the sprocket from turning. Remove the engine mounting bracket from the right hand end of the cylinder head/block, then undo the bolts fixing the timing belt inner cover and the EGR pipe. Unscrew the injector mounting studs one at a time, apply steady and equal tension to the bolts holding the top of the cylinder head and carefully pull it out of position, paying special attention to possible reluctance due to the presence of sealant and corrosion. Lift up the camshafts, disengage the timing chain and remove the exhaust camshaft seal. Prepare a box separated by segments to store and identify the rocker arms and hydraulic adjusters to make sure that they will return to the original positions. Examine for wear/pitting of the bearing surfaces in the cylinder head and for wear of the lobes and journals on the camshaft and renew worn items. Inspect the rocker arms and hydraulic adjusters and replace them if necessary. Make sure the cylinder head and camshaft bearings tops are clean and the secondary timing chain lower guide rail is in place. Smear clean engine oil on the hydraulic adjusters and re-fit them with their rocker arms. Align the timing chain on the camshaft sprockets, lubricating the camshaft and cylinder head bearing journals and lowering the camshafts into position and align the mark on the intake camshaft to the 12 o'clock position. Put a thin bead of Volvo sealant on the mating surface of the cylinder head, making sure the chain tensioner oil supply hole is clear of sealant. Lower the top part of the cylinder head in place and tighten the retaining bolts to the correct torque in sequence. Refit the injector mounting studs and tighten them, refit the camshaft timing chain tensioner assembly and tighten the retaining bolts, then release the guide rail to tension the timing chain. Fit a new exhaust camshaft oil seal, secure the timing belt inner cover and slide a part for the exhaust camshaft in place which will fit the timing belt and lock the timing key. Tighten the sprocket retaining bolt, which prevents the sprocket from rotating, refit the engine mounting bracket and tighten the bolts. Complete the refitting by reversing the steps used for removal, making sure to refit the injectors, install the new timing belt, tensioner and idler pulley, tighten all the fasteners to their specified torque and check the engine oil and coolant levels.


