×
- Hello
- Login or Register
- Quick Links
- Live Chat
- Track Order
- Parts Availability
- RMA
- Help Center
- Contact Us
- Shop for
- Volvo Parts
My Garage
My Account
Cart
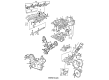
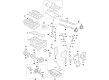
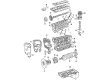
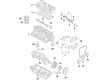
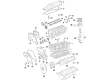
Genuine Volvo Piston Ring
Piston Ring Set- Select Vehicle by Model
- Select Vehicle by VIN
Select Vehicle by Model
orMake
Model
Year
Select Vehicle by VIN
For the most accurate results, select vehicle by your VIN (Vehicle Identification Number).
28 Piston Rings found

Volvo Piston Rings Part Number: 275343
$26.40 MSRP: $30.92You Save: $4.52 (15%)Ships in 1-2 Business DaysProduct Specifications- Other Name: Piston Ring Kit; Piston Ring

Volvo Piston Rings Part Number: 275369
$31.57 MSRP: $36.97You Save: $5.40 (15%)Ships in 1-2 Business DaysProduct Specifications- Other Name: Piston Ring Kit; Piston Ring

Volvo Piston Rings Part Number: 271356
$46.51 MSRP: $54.45You Save: $7.94 (15%)Ships in 1-2 Business DaysProduct Specifications- Other Name: Piston Ring Kit; Piston Ring

Volvo Piston Rings Part Number: 31330725
$48.21 MSRP: $56.46You Save: $8.25 (15%)Ships in 1-2 Business DaysProduct Specifications- Other Name: Piston Ring Kit; Piston Ring

Volvo Piston Rings Part Number: 275372
$48.21 MSRP: $56.46You Save: $8.25 (15%)Ships in 1-2 Business DaysProduct Specifications- Other Name: Piston Ring Kit; Piston Ring

Volvo Piston Ring Set Part Number: 31493192
$61.77 MSRP: $79.76You Save: $17.99 (23%)Ships in 1-2 Business DaysProduct Specifications- Other Name: Piston Ring Kit
- Replaced by: 32240866

Volvo Piston Rings Part Number: 32213048
$61.77 MSRP: $79.76You Save: $17.99 (23%)Ships in 1-2 Business DaysProduct Specifications- Other Name: Piston Ring Ki 2506
- Replaced by: 32240866
Volvo Piston Rings Part Number: 32213696
$61.77 MSRP: $79.76You Save: $17.99 (23%)Ships in 1-2 Business DaysProduct Specifications- Other Name: Piston Ring Kit; Piston Ring, Piston Ring Set
- Replaced by: 32240866
Volvo Piston Rings Part Number: 30731512
$61.77 MSRP: $79.76You Save: $17.99 (23%)Ships in 1-2 Business DaysProduct Specifications- Other Name: Piston Ring Kit; Piston Ring, Piston Ring Set
Volvo Piston Rings Part Number: 30731513
$61.77 MSRP: $79.76You Save: $17.99 (23%)Ships in 1-2 Business DaysProduct Specifications- Other Name: Piston Ring Kit; Piston Ring
Volvo Piston Rings Part Number: 30750278
$61.77 MSRP: $79.76You Save: $17.99 (23%)Ships in 1-2 Business DaysProduct Specifications- Other Name: Piston Ring Kit; Piston Ring
Volvo Piston Rings Part Number: 30750279
$61.77 MSRP: $79.76You Save: $17.99 (23%)Ships in 1-2 Business DaysProduct Specifications- Other Name: Piston Ring Kit; Piston Ring

Volvo Piston Rings Part Number: 30750667
$61.77 MSRP: $79.76You Save: $17.99 (23%)Ships in 1-2 Business DaysProduct Specifications- Other Name: Piston Ring Kit; Piston Ring, Piston Ring Set
Volvo Piston Rings Part Number: 30750668
$61.77 MSRP: $79.76You Save: $17.99 (23%)Ships in 1-2 Business DaysProduct Specifications- Other Name: Piston Ring Kit; Piston Ring
Volvo Piston Rings Part Number: 30750896
$61.77 MSRP: $79.76You Save: $17.99 (23%)Ships in 1-2 Business DaysProduct Specifications- Other Name: Piston Ring Kit; Piston Ring
Volvo Piston Rings Part Number: 30750897
$61.77 MSRP: $79.76You Save: $17.99 (23%)Ships in 1-2 Business DaysProduct Specifications- Other Name: Piston Ring Kit; Piston Ring
Volvo Piston Rings Part Number: 31330721
$61.77 MSRP: $79.76You Save: $17.99 (23%)Ships in 1-2 Business DaysProduct Specifications- Other Name: Piston Ring Kit; Piston Ring

Volvo Piston Rings Part Number: 31359556
$61.77 MSRP: $79.76You Save: $17.99 (23%)Ships in 1-2 Business DaysProduct Specifications- Other Name: Piston Ring Kit; Piston Ring
Volvo Piston Rings Part Number: 31375028
$61.77 MSRP: $79.76You Save: $17.99 (23%)Ships in 1-2 Business DaysProduct Specifications- Other Name: Piston Ring Kit; Piston Ring, Piston Ring Set

Volvo Piston Ring Set Part Number: 31375565
Product Specifications- Other Name: Piston Ring Kit
| Page 1 of 2 |Next >
1-20 of 28 Results
Volvo Piston Ring
Volvo Piston Ring seals in combustion pressure and keeps every engine running strong and is a vital component in the entire range. Volvo began in 1927 in Gothenburg but quickly developed a reputation for producing robust cars, trucks, and buses designed in a Scandinavian spirit of simplicity and the forward-looking system of safety. The brand is a pioneer in the use of the three-point seat belt, for example, and is now pushing electrified powertrains to reduce emissions without compromising comfort. Clean interior layouts with intuitive controls are as much Volvo about clarity as stout build is about dependability families trust in cold winters and long trips. Drivers also appreciate the way Volvo combines good design with practical life. A well-designed Piston Ring backs up that reputation by hugging the cylinder wall with its precise tensioning, trapping those hot gases so fuel energy turns into smooth motion. Each Piston Ring also directs wasted oil back to the sump, cutting consumption and carbon buildup and shedding heat from the piston crown. Modern slim profiles reduce friction but remain tough through sophisticated coatings of molybdenum or hard chromium so that engines rev freely and last longer. Three coordinated Piston Ring pieces are responsible for compression and oil control, ensuring that the power output is protected across the entire lineup and that each and every Volvo delivers the efficiency, reliability, and quiet confidence the badge promises.
Trust OEM Piston Ring for quality that holds up. These parts use top-tier materials to keep your ride running smooth. Because they match exact Volvo specs, you get a flawless fit and a hassle-free install every single time. No more fighting with parts that just won't line up. It is easy to search our massive stock of genuine Volvo options at prices you will really like. Every part comes with a real manufacturer's warranty and a simple return policy. Plus, we ship fast to get your order to you. Shop with confidence and give your Volvo the reliability it deserves.
Volvo Piston Ring Parts and Q&A
- Q: What steps should be followed to check and fit piston rings correctly on Volvo V40?A:At this stage it is assumed that the pistons have been correctly assembled to their respective connecting rods and that the piston ring to groove clearances checked. Before the rings are fitted to the pistons, it is necessary for the end gaps to be checked with the rings fitted in the cylinder bores. Lay out the piston assemblies and the new ring sets in a way that will allow the components to be kept together during and after end gap checking. Position the cylinder block on the work surface, in a side downwards position, with access to the top and bottom of the bores. Take the No 1 piston top ring and insert it in the top of the first cylinder, pushing it down the bore using the top of the piston to ensure that the ring is still square with the cylinder walls. Position the ring close to the bottom of the cylinder bore as well as the lower limit of the ring travel, keeping in mind that the top ring and the second compression ring are different, the second compression being recognizable by the step on the lower surface of the cylinder. Measure the ring gap with the help of feeler blades, repeat the process with the ring set at the end of its travel and compare the measurements with specifications. If new rings are being fitted, then it is unlikely that the end gaps will be too small or if a measurement is found to be undersize then this must be corrected in order to avoid the end gaps of the rings contacting each other during the operation of the engine, which can lead to damage to the engine. Ideally, the end gap should be fitted with new piston rings of the correct fit but, if need be, the end gaps can be increased by careful filing of the ends of the rings. It is also unlikely that the end gap will be too large, if the gaps are too large check that the correct rings for the engine and cylinder bore size are being used. Repeat the checking procedure for all rings in the first cylinder and then for the rings in the other cylinders, taking care to keep rings, pistons and cylinders matched up. Once the ring end gaps have been checked and corrected if necessary, the rings can be fitted to the pistons using the same technique as used for removal but starting with the bottom scraper ring and working up. On non-GDI engines look at the text markings on one side of the top and bottom rings, these must face upwards when fitted; the middle ring is bevelled, and the bevel must face downwards when installed. For GDI engines, we must do the following: - First fit oil scraper in bottom groove consists of three parts: First fit spacer ring and above and below it upper and lower rings, as they are identical. Avoid expanding the compression rings too far and breaking them, and always go by any instructions that came with the new piston ring sets since different manufacturers may specify different procedures. Do not confuse the first and second compression rings, they have different cross-sections. When all the rings are in place, arrange the gaps of the rings 120 degrees apart for non-GDI engines or as specified for GDI engines.
- Q: How should the piston rings be checked and fitted to ensure proper assembly on Volvo V70?A:At this stage, it is assumed, however, that the pistons have been assembled correctly to their respective connecting rods, and that the piston ring-to-groove clearances have been checked. Before the rings are fitted to the pistons, the end gaps should be checked with the rings fitted in the cylinder bores. Lay out the piston assemblies and the new ring sets, keeping the components together during and after end gap checking, with the cylinder block on its side so that it can be accessed on the top and bottom of the bores. Take the No. 1 piston top ring and insert it in the top of the first cylinder pushing it down the bore using the top of the piston to make sure it is square with the cylinder walls so that it is near the bottom of the cylinder bore at the lower limit of ring travel. The top and second compression rings are of a different type, the second ring being identified by the step on the lower surface. Measure the ring gap with feeler blades, and repeat the process with the ring at the top of its travel, and compare the measurements with the specifications. If new rings are being fitted, it is unlikely that the end gaps will be too small, however, if a measurement is found to be undersize, then it must be corrected to avoid the risk of the end of the rings contacting each other during the engine operation, which could lead to engine damage. Ideally new piston rings with the correct end gap should be fitted, but as a last resort the end gaps can be increased by carefully filing the ends of the rings with a fine file. Mount the ring in a vice using soft jaws, slip the ring over the file, moving the ring slowly to remove material from the ends, be careful because piston rings are sharp and easily broken. It is also unlikely that the gap at the end will be too large, if the gaps are too big, check that the right rings for the size of engine and cylinder bore are being used. Repeat the checking procedure for every ring in the first cylinder, and then for rings in the other cylinders, making sure that rings, pistons, and cylinders are matched up. Once the ring end gaps have been checked and corrected if necessary, the rings can be fitted to the pistons using the same technique as for removal, starting with the bottom scraper ring and working up. For petrol engines the lower oil scraper ring is a 3-part ring, so you must install the spring-like expander ring first, then the two plain rings either side. Observe the text markings on one side of the top and bottom rings which must face upwards when fitted, but the middle ring, which is bevelled, must have the bevel facing downwards. Do not expand the compression rings too far or it would break and always follow any instructions supplied with the new piston ring sets as different manufacturers may use different procedures. And avoid mixing top and second compression rings as they differ in their cross-section. When all the rings are in position, the ring gaps should be 120o apart except the 3-part oil scraper ring in which the two plain rings should be 90o apart from each other.
Related Volvo Parts
 Volvo Oil Filter
 Volvo Engine Mount
 Volvo Camshaft
 Volvo Idler Pulley
 Volvo Valve Cover Gasket
 Volvo Camshaft Bearing
 Volvo Oil Filter Gasket
 Volvo Rocker Arm
 Volvo Timing Chain Guide
 Volvo Timing Cover
 Volvo Valve Lifter
 Volvo Valve Stem Oil Seal
Browse by Model
240 Piston Ring 740 Piston Ring 760 Piston Ring 780 Piston Ring 940 Piston Ring C30 Piston Ring C70 Piston Ring S40 Piston Ring S60 Cross Country Piston Ring S60 Piston Ring S70 Piston Ring S80 Piston Ring S90 Piston Ring V40 Piston Ring V50 Piston Ring V60 Cross Country Piston Ring V60 Piston Ring V70 Piston Ring V90 Cross Country Piston Ring V90 Piston Ring XC40 Piston Ring XC60 Piston Ring XC70 Piston Ring XC90 Piston Ring