×
- Hello
- Login or Register
- Quick Links
- Live Chat
- Track Order
- Parts Availability
- RMA
- Help Center
- Contact Us
- Shop for
- Volvo Parts
My Garage
My Account
Cart
Genuine Volvo Brake Light Switches
Stop Light Switches- Select Vehicle by Model
- Select Vehicle by VIN
Select Vehicle by Model
orMake
Model
Year
Select Vehicle by VIN
For the most accurate results, select vehicle by your VIN (Vehicle Identification Number).
19 Brake Light Switches found


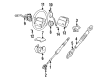
Volvo Air Baffle, Passenger Side Part Number: 31323243
$28.24 MSRP: $37.64You Save: $9.40 (25%)Ships in 1-2 Business DaysProduct Specifications- Other Name: Sealing; Brake Light Switches
- Position: Passenger Side

Volvo Stoplamp Switch Part Number: 3544691
$19.19 MSRP: $22.47You Save: $3.28 (15%)Ships in 1-2 Business DaysProduct Specifications- Other Name: Stop Light Switch; Brake Light Switches; Brake Light Switch


Volvo Stoplamp Switch Part Number: 30773935
$28.73 MSRP: $36.80You Save: $8.07 (22%)Ships in 1-2 Business DaysProduct Specifications- Other Name: Switch; Brake Light Switches; Brake Light Switch; Switch


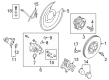
Volvo Parking Brake Switch, Black/Charcoal Part Number: 31433500
$51.09 MSRP: $65.43You Save: $14.34 (22%)Ships in 1-2 Business DaysProduct Specifications- Other Name: Switch; Brake Light Switches; Parking Brake Switch, Release Switch, Switch
Volvo Parking Brake Switch, Beige Part Number: 31433501
$51.09 MSRP: $65.43You Save: $14.34 (22%)Ships in 1-2 Business DaysProduct Specifications- Other Name: Switch; Brake Light Switches; Parking Brake Switch, Release Switch

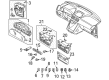
Volvo Parking Brake Switch Part Number: 31456219
$87.08 MSRP: $112.46You Save: $25.38 (23%)Ships in 1-2 Business DaysProduct Specifications- Other Name: Switch; Brake Light Switches; Switch
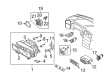
Volvo Parking Brake Switch, Black/Charcoal Part Number: 31433703
$136.17 MSRP: $175.85You Save: $39.68 (23%)Ships in 1-2 Business DaysProduct Specifications- Other Name: Switch; Brake Light Switches
Volvo Parking Brake Switch, Beige Part Number: 31433704
$136.17 MSRP: $175.85You Save: $39.68 (23%)Ships in 1-2 Business DaysProduct Specifications- Other Name: Switch; Brake Light Switches
- Replaces: 31334638

Volvo Parking Brake Warning Switch Part Number: 30683357
$10.91 MSRP: $12.77You Save: $1.86 (15%)Ships in 1-2 Business DaysProduct Specifications- Other Name: Switch; Brake Light Switches
Volvo Parking Brake Warning Switch Part Number: 3345599
$10.91 MSRP: $12.77You Save: $1.86 (15%)Ships in 1-2 Business DaysProduct Specifications- Other Name: Switch; Brake Light Switches
Volvo Parking Brake Warning Switch Part Number: 9191483
$8.31 MSRP: $10.64You Save: $2.33 (22%)Ships in 1-2 Business DaysProduct Specifications- Other Name: Switch; Brake Light Switches
Volvo Parking Brake Warning Switch Part Number: 30714593
$17.57 MSRP: $22.50You Save: $4.93 (22%)Ships in 1-2 Business DaysProduct Specifications- Other Name: Switch; Brake Light Switches

Volvo Stoplamp Switch Part Number: 32212362
$23.16 MSRP: $29.66You Save: $6.50 (22%)Ships in 1-2 Business DaysProduct Specifications- Other Name: Stop Light Switch; Brake Light Switches; Sensor
Volvo Stoplamp Switch Part Number: 8622064
$23.16 MSRP: $29.66You Save: $6.50 (22%)Ships in 1-2 Business DaysProduct Specifications- Other Name: Stop Light Switch; Brake Light Switches; Brake Light Switch
Volvo Stoplamp Switch Part Number: 9128577
$23.16 MSRP: $29.66You Save: $6.50 (22%)Ships in 1-2 Business DaysProduct Specifications- Other Name: Stop Light Switch; Brake Light Switches

Volvo Stoplamp Switch Part Number: 31362641
$117.18 MSRP: $151.32You Save: $34.14 (23%)Ships in 1-2 Business DaysProduct Specifications- Other Name: Sensor; Brake Light Switches; Sensor
Volvo Stoplamp Switch Part Number: 31381618
$117.18 MSRP: $151.32You Save: $34.14 (23%)Ships in 1-2 Business DaysProduct Specifications- Other Name: Sensor; Brake Light Switches; Sensor
Volvo Parking Brake Warning Switch Part Number: 1258467
$6.31 MSRP: $7.39You Save: $1.08 (15%)Ships in 1-2 Business DaysProduct Specifications- Other Name: Switch 2511; Brake Light Switches
Volvo Stoplamp Switch Part Number: 9442070
$24.56 MSRP: $28.76You Save: $4.20 (15%)Ships in 1-2 Business DaysProduct Specifications- Other Name: Stop Light Switch; Brake Light Switches
Volvo Brake Light Switches
Volvo Brake Light Switches immediately activate the brake lamps in the rear, alerting traffic and minimizing the risk of rear-end collisions when the driver is pedaling on the brake pedal. Volvo began building vehicles in 1927 in Gothenburg and has expanded into a global manufacturer of cars, trucks, and buses, with an ever-strong emphasis on safety and clean Scandinavian design. The company pioneered the three-point seat belt, integrates reliable braking systems, and continues to explore electric powertrains that balance performance and environmental care. Simple controls for everything inside every Volvo give comfort and confidence, and the commitment to durability means owners can clock up high mileage with confidence. This heritage of innovation makes for the perfect backdrop for Brake Light Switches as it protects the occupants every time the car slows down. Brake Light Switches from Volvo feature a small plunger structure next to the brake pedal that trips an electrical circuit the moment the pedal moves forward, sending current only to the brake lamps and keeping the wiring for the brake lights separate from other lighting controls. The switch remains easy to get to, so checks are easy to make if lamps ever fail to light. Because it is an independent system, the heat load on dash electronics is low, maintaining long-term reliability throughout the entire Volvo range. Regular attention to these Brake Light Switches ensures that deceleration signals remain crisp in city traffic, in the dark, and in foul weather.
Trust OEM Brake Light Switches for quality that holds up. These parts use top-tier materials to keep your ride running smooth. Because they match exact Volvo specs, you get a flawless fit and a hassle-free install every single time. No more fighting with parts that just won't line up. It is easy to search our massive stock of genuine Volvo options at prices you will really like. Every part comes with a real manufacturer's warranty and a simple return policy. Plus, we ship fast to get your order to you. Shop with confidence and give your Volvo the reliability it deserves.
Volvo Brake Light Switches Parts and Q&A
- Q: How are Brake Light Switches installed and adjusted on Volvo 740?A:The switch for the brake lights is located at the brake pedal which engages and turns on the lights as the pedal moves from its rest position. In order to remove the switch, you first remove the soundproofing, then the electrical connectors at the switch and the locknut is unscrewed to take out the switch. For installation, put the new switch in place, install the locknut and reconnect the electric connectors. After fitting the new switch, it will need to be adjusted so that the brake lights are activated when the brake pedal is depressed about 3/8 - 1/2 inches (8-14mm).
- Q: What are Brake Light Switches, and How to locate, remove, and adjust them on Volvo V40?A:The stop light switch is provided on the pedal bracket behind the facia, models with cruise control have two switches on the brake pedal, the upper one is the stop light switch, and no vacuum pipe is connected. To remove it, undo the retaining screws, which the lower screw is behind a trim cap, and remove the driver's side lower panel from the facia with the wiring connector from the footwell light. After removing the wiring connector, unscrew the switch and remove it from the bracket. For refitting and for adjustment, gently push the switch in position in the pedal mounting bracket. Use a continuity tester across the switch terminals screwing the switch in until you get an open circuit and check it gently depress the pedal to check continuity after about 5 or so mm of travel. Adjust the switch accordingly to achieve proper operation because the anti-lock braking system performance may be impacted due to incorrect adjustment. If a continuity tester is not available, the adjustment can be checked by reconnecting the switch and having an assistant watch the stop-lights with the ignition switched on. After correctly adjusting the stop-light switch, attach the wiring connector and refit the panel to the facia making sure the switch for stop-lights works properly before using the vehicle.

Related Volvo Parts
 Volvo Ignition Switch
 Volvo Air Bag
 Volvo Fuel Level Sensor
 Volvo Ignition Lock Cylinder
 Volvo Power Seat Switch
 Volvo Back up Alarm
 Volvo Door Jamb Switch
 Volvo Door Lock Switch
 Volvo Exhaust Nut
 Volvo Hazard Warning Switches
 Volvo Mirror Switch
 Volvo Vehicle Speed Sensors
Browse by Model
240 Brake Light Switches 242 Brake Light Switches 244 Brake Light Switches 245 Brake Light Switches 740 Brake Light Switches 760 Brake Light Switches 780 Brake Light Switches 850 Brake Light Switches 940 Brake Light Switches 960 Brake Light Switches C30 Brake Light Switches C40 Recharge Brake Light Switches C70 Brake Light Switches S40 Brake Light Switches S60 Brake Light Switches S60 Cross Country Brake Light Switches S70 Brake Light Switches S80 Brake Light Switches S90 Brake Light Switches V40 Brake Light Switches V50 Brake Light Switches V60 Brake Light Switches V60 Cross Country Brake Light Switches V70 Brake Light Switches V90 Brake Light Switches V90 Cross Country Brake Light Switches XC40 Brake Light Switches XC40 Recharge Brake Light Switches XC60 Brake Light Switches XC70 Brake Light Switches XC90 Brake Light Switches