×
- Hello
- Login or Register
- Quick Links
- Live Chat
- Track Order
- Parts Availability
- RMA
- Help Center
- Contact Us
- Shop for
- Volvo Parts
My Garage
My Account
Cart
Genuine Volvo 960 Alloy Wheels
Alloy Factory Wheels- Select Vehicle by Model
- Select Vehicle by VIN
Select Vehicle by Model
orMake
Model
Year
Select Vehicle by VIN
For the most accurate results, select vehicle by your VIN (Vehicle Identification Number).
1 Alloy Wheels found

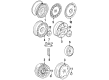
Volvo 960 Wheel, Alloy Part Number: 9184863
$311.65 MSRP: $371.01You Save: $59.36 (16%)Ships in 1-2 Business Days
Volvo 960 Alloy Wheels
OEM parts are the only choice for top quality and real functionality. They pass strict checks, and they match Volvo's factory specs, so installation is easy. If you need new Alloy Wheels and you want quality and fit. You will find both here. Our site has a wide range of OEM Volvo 960 parts. The prices are unbeatable, allowing you to get value for money. Each genuine 960 Alloy Wheels comes with the manufacturer's warranty. That gives you peace of mind. We ship fast to your door. Order today, and enjoy a smooth, no-hassle upgrade with parts that fit right.
Volvo 960 Alloy Wheels Parts and Q&A
- Q: How do Alloy Wheels affect the process of removing and installing a tire on Volvo 960?A:To remove and install a tire, first park the vehicle on level ground and assemble the jack, tire iron and spare tire, if necessary. Position the jack appropriately and remove the lug nut trim caps if any. For vehicles that have a wheel cover or hub cap, use the tire iron to pry it off. Engage the parking brake and lock a diagonally opposite wheel with chocks (this can be bought or made from wood). For automatic transmissions, push the selector in Park and for manual, move to Reverse. With the tires on the ground, loosen the lug nuts with the tire iron, being careful not to expose nuts stuck from the heat as it may damage the wheel. If needed, a few heavy hammer blows on the bolt may help to loosen rusted nuts. Raise the vehicle with the jack until the tire is off the ground and put it on jackstands. Remove the lug nuts and remove the tire and wheel assembly. For installation, be sure to clean the mating surfaces and lug studs of rust. Install the tire and wheel assembly, hand tightening the lug nuts before tightening them with the tire wrench in a crisscross pattern. Raise the vehicle, remove jack stands and lower the vehicle. Use a torque wrench to tighten the lug nuts using the specified torque in a crisscross pattern. If applicable, attach the wheel cover or hub cap making sure to leave the valve stem in place. Reinstall any lug nut trim caps and place the jack and tire iron in their compartments and remove the wheel chocks. If a flat or damaged tyre was removed put it in the vehicle for repair or replacement. For inspection, examine the tires for lacerations, punctures, and sharp objects and examine treadwear and air pressure. In addition, check the wheel assemblies for dents, cracks, rust, and metal fatigue and repair or replace as needed.
Related Volvo 960 Parts
 Volvo 960 Axle Beam Mount
 Volvo 960 Axle Support Bushings
 Volvo 960 Ball Joint
 Volvo 960 Coil Spring Insulator
 Volvo 960 Control Arm Bushing
 Volvo 960 CV Joint
 Volvo 960 Shock Absorber
 Volvo 960 Shock and Strut Boot
 Volvo 960 Steering Knuckle
 Volvo 960 Sway Bar
 Volvo 960 Trailing Arm
 Volvo 960 Wheel Bearing Dust Cap