×
- Hello
- Login or Register
- Quick Links
- Live Chat
- Track Order
- Parts Availability
- RMA
- Help Center
- Contact Us
- Shop for
- Volvo Parts
My Garage
My Account
Cart
Genuine Volvo 780 Axle Shaft
Car Axle Shaft- Select Vehicle by Model
- Select Vehicle by VIN
Select Vehicle by Model
orMake
Model
Year
Select Vehicle by VIN
For the most accurate results, select vehicle by your VIN (Vehicle Identification Number).
1 Axle Shaft found

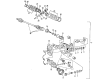
Volvo 780 Axle Shaft Part Number: 3502336
$428.83 MSRP: $549.78You Save: $120.95 (22%)Ships in 1-2 Business Days
Volvo 780 Axle Shaft
OEM parts are the only choice for top quality and real functionality. They pass strict checks, and they match Volvo's factory specs, so installation is easy. If you need new Axle Shaft and you want quality and fit. You will find both here. Our site has a wide range of OEM Volvo 780 parts. The prices are unbeatable, allowing you to get value for money. Each genuine 780 Axle Shaft comes with the manufacturer's warranty. That gives you peace of mind. We ship fast to your door. Order today, and enjoy a smooth, no-hassle upgrade with parts that fit right.
Volvo 780 Axle Shaft Parts and Q&A
- Q: How to remove and install the axle shaft on Volvo 780?A:To remove and install the axle shaft for the 850, C70, S70, V70 models, first put the vehicle up on all four wheels, loosen the axle shaft nut, and then raise and support the vehicle in a safe way and remove the wheels. Disconnect the ABS sensor from the axle shaft without disconnecting the harness, and disconnect all the brackets for brake lines and ABS wiring on either side and let them hang. Remove the axle nut and use a soft drift and mallet to push the axle shaft from the hub. Disconnect the sway bar from the link, remove all the splash guards, and the ball joint from the control arm, ensuring care is taken not to damage the boots. For the right side axle shaft, remove the bearing cap and pull the axle shaft out of the transmission while holding the strut aside, and insert a plug in the transmission. For the left side, carefully pull the axle shaft out of the transmission, while holding the strut assembly out of the way and install a plug into the transmission. To install, put the right axle shaft in place and tighten the bearing cap to 19 ft. lbs. (25 Nm) and put the splashguard on, making sure the transmission axle seal and axle boot are not damaged. Clean the ABS wheel if required, and apply metal adhesive to the axle shaft splines, and then push the shaft in until the lock ring locks with the differential gear and check by pulling on the shaft joint housing. Install axle nut and hand tighten, connect ball joints new nuts, install sway bar link new nuts, reconnect brake lines and ABS cable bracket on two sides, install ABS sensor on axle shaft and clean, install wheels. With all the wheels on the ground, tighten the axle nut to 89 ft. lbs. (120 Nm) plus an additional 60deg, locking the nut by staking its flange in the driveshaft groove. For CV-joint overhaul, know the type of joint before replacing it as different vehicles may have different joints such as Birfield Joint, Tripod Joint or Double Offset Joint. Do not take a Birfield joint apart, but service it with a new joint, or clean and repack it with a new boot kit. Make sure to get the distance between the large and small boot bands right to avoid premature wear and cracking. The Double Offset Joint is normally used as an inboard joint, to service this joint remove the axle shaft, cut the metal retaining bands and remove the boot from the joint outer race. Remove the huge circlip and outer race, then remove the inner race, cage and balls in one piece, rinsing them without disassembly. If you are re-using the boot, wipe the grease from the splines and wrap them in vinyl tape before sliding the boot off. When installing the axle shaft, they tape the shaft splines, fill the boot with specified grease, install the cage on the axle shaft, and tap the inner race into position. Fill the outer race with grease before installation, tighten the boot bands as tight as possible and make sure the distance between them is correct before reinstalling the axle shaft. For other types of joints, disconnect the negative battery cable, remove the axle shaft and use side cutter pliers to remove the metal retaining bands from the boots. Slide the boot from the case, snap off the snapring and tripod joint spider assembly and wrap vinyl tape around the spline to protect it (for reusing the boot). After you have taken the necessary steps to ensure correct replacement parts, you can then install the joint spider assembly and snapring, fill the boot with specified grease, secure the boot bands, and reinstall the axle shaft, reconnecting the negative battery cable after it is installed.


