×
- Hello
- Login or Register
- Quick Links
- Live Chat
- Track Order
- Parts Availability
- RMA
- Help Center
- Contact Us
- Shop for
- Volvo Parts
My Garage
My Account
Cart
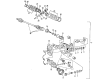
Genuine Volvo 760 Axle Shaft
Car Axle Shaft- Select Vehicle by Model
- Select Vehicle by VIN
Select Vehicle by Model
orMake
Model
Year
Select Vehicle by VIN
For the most accurate results, select vehicle by your VIN (Vehicle Identification Number).
1 Axle Shaft found

Volvo 760 Axle Shaft Part Number: 3502336
$428.83 MSRP: $549.78You Save: $120.95 (22%)Ships in 1-2 Business Days
Volvo 760 Axle Shaft
OEM parts are the only choice for top quality and real functionality. They pass strict checks, and they match Volvo's factory specs, so installation is easy. If you need new Axle Shaft and you want quality and fit. You will find both here. Our site has a wide range of OEM Volvo 760 parts. The prices are unbeatable, allowing you to get value for money. Each genuine 760 Axle Shaft comes with the manufacturer's warranty. That gives you peace of mind. We ship fast to your door. Order today, and enjoy a smooth, no-hassle upgrade with parts that fit right.
Volvo 760 Axle Shaft Parts and Q&A
- Q: How to remove and install axle shafts on Volvo 760?A:The procedure to remove and install axle shafts on vehicles that have multi-link rear suspensions consists of several steps. First, loosen the large halfshaft retaining nut in the middle of the wheel bearing housing, then loosen the halfshaft retaining nut. Next, jack up and safely support the vehicle and take off the wheel(s). At the center of the car, delete the eight bolts that secure the upper and lower pieces of the final drive housing. After that, remove bolts that support the halfshaft to the final drive unit (differential), and remove the shaft from the wheel bearing housing. Upon removal, examine the rubber boots for any evidence of splitting or cracking and make sure they are intact and waterproof to ensure protection to the joint. To install, fit the thread end at the wheel and then knock up and fit the inboard end by using new bolts that have been lightly oiled, tighten to 70 ft-lbs (95 Nm). Reinstalling the lower section of the final drive housing, and before the tightening of the eight mounting bolts, insert two 12mm long bolts or drifts in the centering holes to align the panel for proper wheel alignment. Tighten the eight mounting bolts 52 ft-lbs (71 Nm) plus an additional 30 degrees of rotation. Use a new, lightly oiled halfshaft retaining nut on the threaded end of the shaft and tighten it until it is snug, but not quite all the way. After installation of the wheel(s) and lowering the vehicle, engage the hand brake and tighten the halfshaft nut to 103 ft-lbs (140 Nm) plus 60 degrees of rotation, being sure to double check the wheel lugs for proper tightness.
Related Volvo 760 Parts
 Volvo 760 Axle Shaft Seal
 Volvo 760 Differential Cover
 Volvo 760 Driveshaft Center Support Bearing
 Volvo 760 Ring And Pinion
 Volvo 760 Universal Joints