×
- Hello
- Login or Register
- Quick Links
- Live Chat
- Track Order
- Parts Availability
- RMA
- Help Center
- Contact Us
- Shop for
- Volvo Parts
My Garage
My Account
Cart
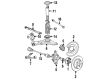
Genuine Volvo 960 Alternator
Generator- Select Vehicle by Model
- Select Vehicle by VIN
Select Vehicle by Model
orMake
Model
Year
Select Vehicle by VIN
For the most accurate results, select vehicle by your VIN (Vehicle Identification Number).
2 Alternators found

Volvo 960 Alternator Part Number: 5003698
$457.94 MSRP: $544.42You Save: $86.48 (16%)Ships in 1-2 Business Days
Volvo 960 Alternator Part Number: 8111116
Volvo 960 Alternator
The Volvo 960 Alternator maintains the electrical system of the sedan by converting engine-driven movement into a constant flow of battery-charging current. It has a rotor in fixed stator windings that is rotated by its shaft, and the moving magnetic field generates alternating current that is immediately transformed to direct current to the lights, ignition, audio, and the battery itself by the built-in diode pack. On the front of the shaft, a pulley and a cooling fan are placed so that the serpentine belt can be applied to convey mechanical power, as well as force fresh air through the vents and heat sinks on the rectifier to ensure further protection of delicate electronic components. The initial Volvo models applied either an external or internal voltage regulator to scale field current to maintain constant output, but later 960 models leave that to the powertrain control module, reducing the complexity of wiring and improving response at variable electrical loads. The designs have the same fundamentals, but the main development of the Alternator in the series is the placement of regulators. Solid front and rear bearings hold the spinning shaft in place, and strong brushes keep in touch with the rotor slip rings to ensure that the second generation of Volvo offers long-term smoother working. Irrespective of the age, there are a couple of heavy-duty bearings and heat-dispersant fins which ensure that the Volvo Alternator can comfortably serve all parts during stop-and-go traffic or when on the highway.
OEM parts are the only choice for top quality and real functionality. They pass strict checks, and they match Volvo's factory specs, so installation is easy. If you need new Alternator and you want quality and fit. You will find both here. Our site has a wide range of OEM Volvo 960 parts. The prices are unbeatable, allowing you to get value for money. Each genuine 960 Alternator comes with the manufacturer's warranty. That gives you peace of mind. We ship fast to your door. Order today, and enjoy a smooth, no-hassle upgrade with parts that fit right.
Volvo 960 Alternator Parts and Q&A
- Q: How to conduct a voltage test and perform the removal and installation of an alternator on Volvo 960?A:To perform a voltage test, turn the engine OFF and turn the headlights ON and leave them running for 15-20 seconds to discharge any surface charge from the battery and then use a DVOM set to Volts DC to probe across the battery terminals and note the voltage reading. For no load test, we should connect a tachometer to engine and it should be in PARK position of Transmission and we should set the emergency brake and switch off all the electrical loads and start an engine and increase speed to around 1500 rpm and check the voltage of battery, it will show an increase of at least 0.5 volts but no more than 2.5 volts. If the voltage doesn't go up by more than 0.5 volts, the alternator is not charging and if it goes to further than 2.5 volts it is overcharging, usually because there is something wrong with the alternator or any other component and further testing is required to see what exactly broke. For a load test, with the engine running, turn on the blower motor and high beams, increase engine speed to 2000 rpm and measure the voltage at the battery, which should be increasing at least 0.5 volts from the previous test, where a failure to meet specifications indicates a malfunctioning charging system. In the process of removing and installing the alternator, disconnect the negative cable of the battery, loosen the adjusting bolts of the alternator if equipped, remove the drive belt, disconnect the electrical leads, remove the mounting bolts of the alternator, and the alternator can be removed. For installation, make sure to place the alternator into the bracket, make sure to secure the mounting bolts, connect the electrical leads, install the drive belt, tension, re-connect the negative battery cable, and check whether the alternator is working. Specific models such as 850/C70/S70/V70 will require the power steering pump and tensioner bracket be removed to get to the alternator and then you will follow similar steps as outlined for the installation.


