×
- Hello
- Login or Register
- Quick Links
- Live Chat
- Track Order
- Parts Availability
- RMA
- Help Center
- Contact Us
- Shop for
- Volvo Parts
My Garage
My Account
Cart
Genuine Volvo 740 Blower Motor
A/C Heater Blower Motor- Select Vehicle by Model
- Select Vehicle by VIN
Select Vehicle by Model
orMake
Model
Year
Select Vehicle by VIN
For the most accurate results, select vehicle by your VIN (Vehicle Identification Number).
1 Blower Motor found

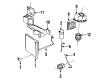
Volvo 740 Blower Motor Part Number: 30676867
Volvo 740 Blower Motor
The essence of the Volvo 740 Blower Motor is to move hot or cool air into the cabin to enable the occupants to have the preferred temperature all year round. The Blower Motor is activated by an HVAC control module connected by wiring to easily accessible dash switches, and it causes a fan to blow air across the core of the heater and air conditioning evaporator to direct that air through vents toward the passengers and out of the windows to quickly defog. Volvo drivers naturally turn or slide the controls to allow the required amount of airflow, and the Volvo module reacts by adjusting the electric current supplying the fan, and the system switches between a cool breeze and full throttle on a cold morning or a hot afternoon. Should the electronic board fail, should the wiring open, or should the physical knobs snap off, the loss of control of temperature and airflow is immediate. During the manufacturing cycle, the majority of Volvo 740 models were equipped with one front Blower Motor, as the sedan and wagon body designs did not have to feature a second rear unit, as seen on larger SUVs, and thus the difference is only a few changes in electrical connector design instead of completely different designs. No matter the trim level, all Volvos share the same fundamental design, which consists of a robust fan blade, a small electric motor, and a sensitive control system that ensures cabin comfort and a clear view and good driving experiences, so it is essential to quickly replace failed parts.
OEM parts are the only choice for top quality and real functionality. They pass strict checks, and they match Volvo's factory specs, so installation is easy. If you need new Blower Motor and you want quality and fit. You will find both here. Our site has a wide range of OEM Volvo 740 parts. The prices are unbeatable, allowing you to get value for money. Each genuine 740 Blower Motor comes with the manufacturer's warranty. That gives you peace of mind. We ship fast to your door. Order today, and enjoy a smooth, no-hassle upgrade with parts that fit right.
Volvo 740 Blower Motor Parts and Q&A
- Q: How to remove and install the Blower Motor components on Volvo 740?A:To remove and install components in the 240 Series and Coupe, begin by disconnecting the negative battery cable before removing the sound insulation and side panels around the radio, if any. Next, remove the control panel and center console, center air vents, cable, and electrical connectors of the clock, glove compartment, and air ducts. On the right side, remove the air ducts and disconnect vacuum hoses from the shutter actuators and fold back the floor mat to access the rear floor duct screw and move the duct aside. Remove the outer blower motor housing and blower motor wheel, remembering that there might be support under the glove compartment that need to be removed for access. Disconnect the blower motor switch and electrical leads and repeat for the air ducts and vacuum hoses on the left side. Remove the inner blower motor casing, vacuum hose, electrical connector, and blower motor. If it needs to be replaced, a modified unit is available for specific instructions. For installation, you have to clean the heater housing and then install the blower motor, electrical connector, vacuum hose and inner casing before you install the blower motor wheel and outer casing. Reinstall the air duct that vents to the outside through the rear of the floor and the mat of the floor, connect air ducts and vacuum hoses, and re-connect the electrical leads to the blower motor switch. Finally, reinstall the center air vents, control panel, center console, sound insulation and side panels and reconnect the negative battery cable before testing the operation of the system. For 740 Series, it is removing the lower glove box panel, unfastening and removing the electrical connector from the blower motor, removing the blower motor assembly, and cleaning and installing parts. In the 760, 760, 900 Series and S90/V90 with automatic climate control, the procedure involves removing the battery, the lower glove box panel, instep molding, control unit after cleaning and re-installation of the blower motor and other parts. For models with electronic climate control the steps are to disconnect the battery, remove the lower glove box panel, and blower motor housing parts, clean and reinstall the blower motor. In the 850 and C70/S70/V70 Series, disconnect the battery, remove the soundproofing panels, glove compartment and fan motor and install the new fan motor and components in reverse order, reconnect the battery, and test the function of the fan motor.


